![[Guide] Integrate the Wyzed LMS with your Confluence account](https://www.wyzed.com/wp-content/uploads/2019/06/cooperation-coworking-day-1543895-1568x1045.jpg)
Follow this guide to easily add the Wyzed LMS to your Confluence account (Includes Single Sign On)
The Wyzed LMS and Confluence integration is one of our most popular integrations, and allows Confluence Users to add a powerful LMS to their Confluence account.
This integration only takes a few moments to set up, but allows your users to access all of your Wyzed LMS courses and training in a single click from Confluence.
The most important thing in any learning environment to be effective is that it is EASY for your users to ACCESS.
And If it’s not easy, your users won’t access it. Full stop.
To make things even simpler, we also incorporated SSO (Single Sign On) into this integration.
Which means your users can easily pass back and forth between Wyzed and Confluence without needing to remember login details or passwords.
[Watch Video] See how the Wyzed LMS Add-On works within Confluence
Part 1: Integrating your Wyzed LMS with your Confluence Account
Watch and follow the video below to complete the Wyzed/Confluence integration
[Watch Video] Step-by-step instructions on how to integrate the Wyzed LMS with your Confluence account.
Step 1: Install the Wyzed LMS Add-On into your Confluence Cloud or Server environment from the Confluence Marketplace
Step 2: On your Confluence system, access your General Configuration page
Step 3: Navigate to either the Manage Add-Ons, or alternatively scroll to the bottom of your Confluence General Configuration Page and click on Wyzed Admin

Step 4: Next we need to copy the Login URL from your Confluence System and enter it into your Wyzed account.
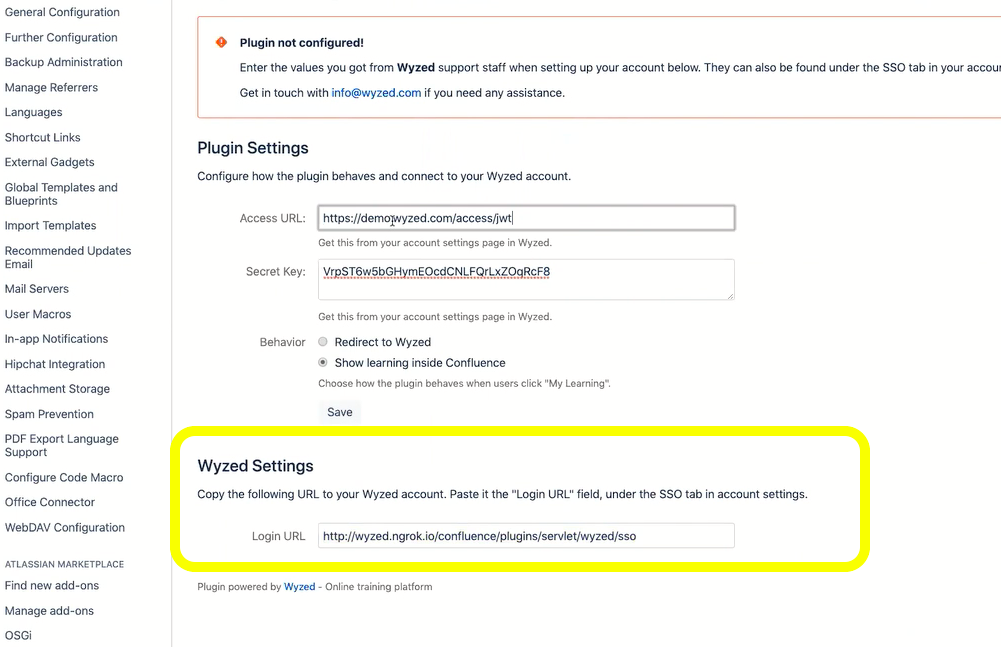
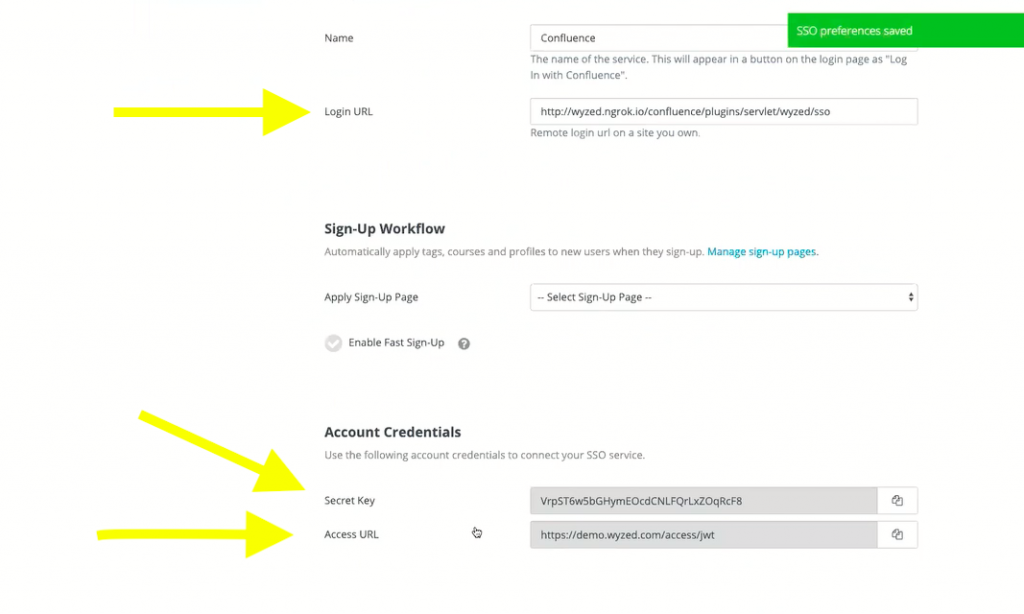
Step 4a: Take the Confluence Login URL (see image above) and enter it into your Wyzed SSO tab as shown below.
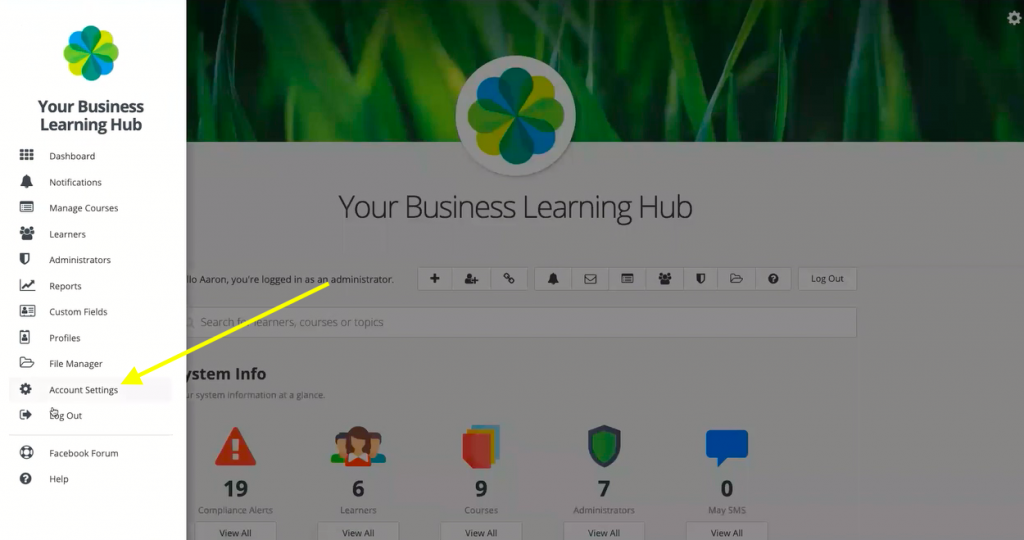
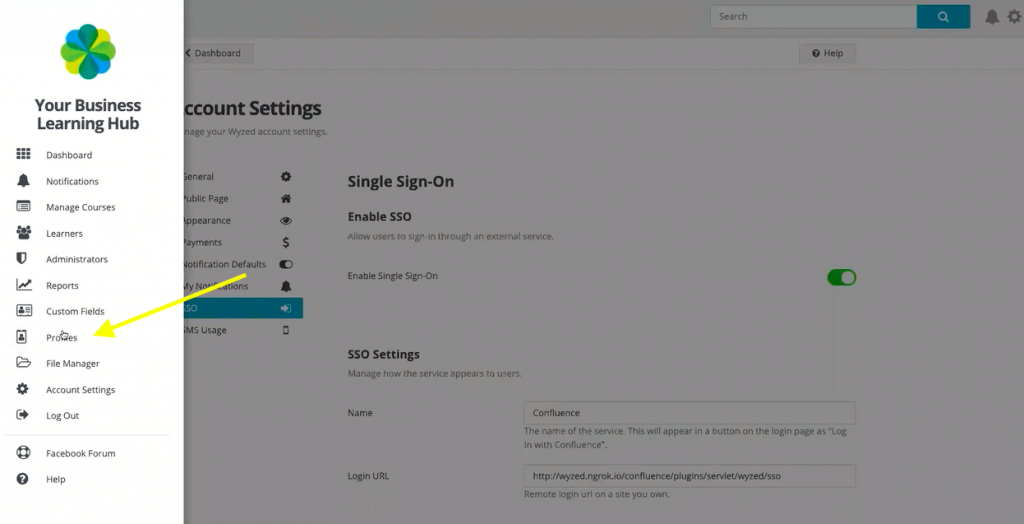
To access your Wyzed SSO tab, click on the top left hand side of your screen (see image below)

Step 4b: Click on the Account Settings tab.
Step 4c: And click on the SSO tab. (note that if the SSO tab is not present, you will need to contact us at info@wyzed.com for us to turn this feature on if not already done so)
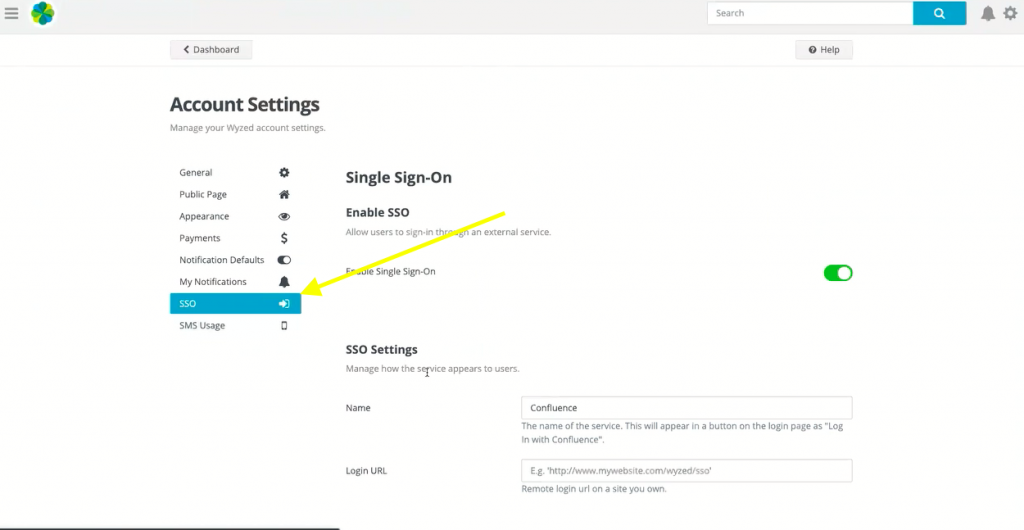
Step 4d: And then entering in the Confluence Login URL in as well as taking the Secret Key and Login URL and entering them back in your Confluence system.
Great work!
You’ve now integrated your Wyzed LMS account with your Confluence account.
The next step is to configure how you would like the Wyzed LMS to display to your users in your Confluence account.
Part 2: Selecting how you want the Wyzed LMS to display inside your Confluence account
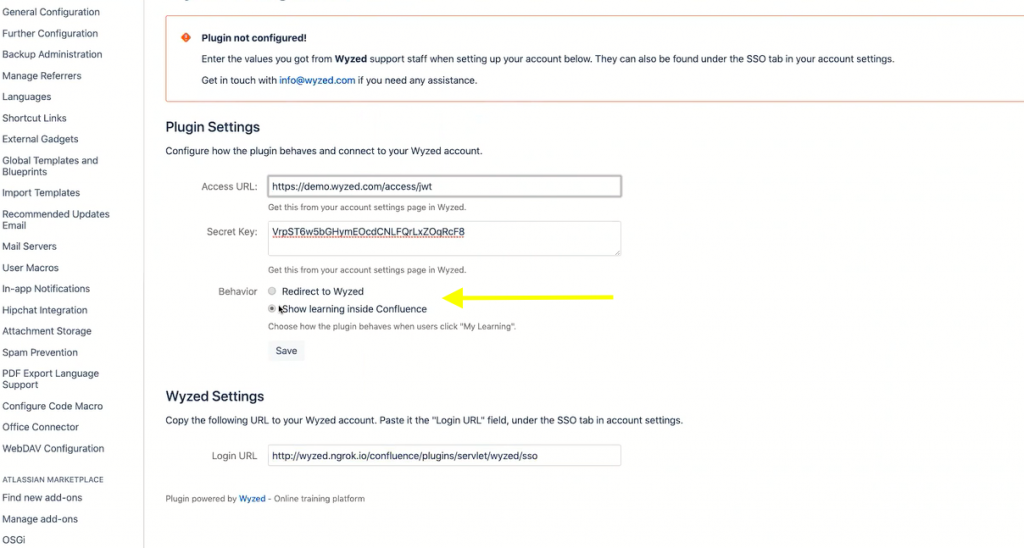
Next, we want to choose how your Confluence users will experience the Wyzed system.
The most common option is to select it to: Show your learning inside Confluence.
This will bring the Wyzed experience into the Confluence page so the Confluence User feels like they’re still operating in the Confluence environment.
Step 5: Access your Confluence https://www.wyzed.com/wp-content/uploads/2022/07/staffdevelopment-768×407-1.jpeg page and select the Wyzed Add-On. From here select which display you would like and be sure to click save.
Once you hit Save, confluence will then notify you that your integration has been successful.
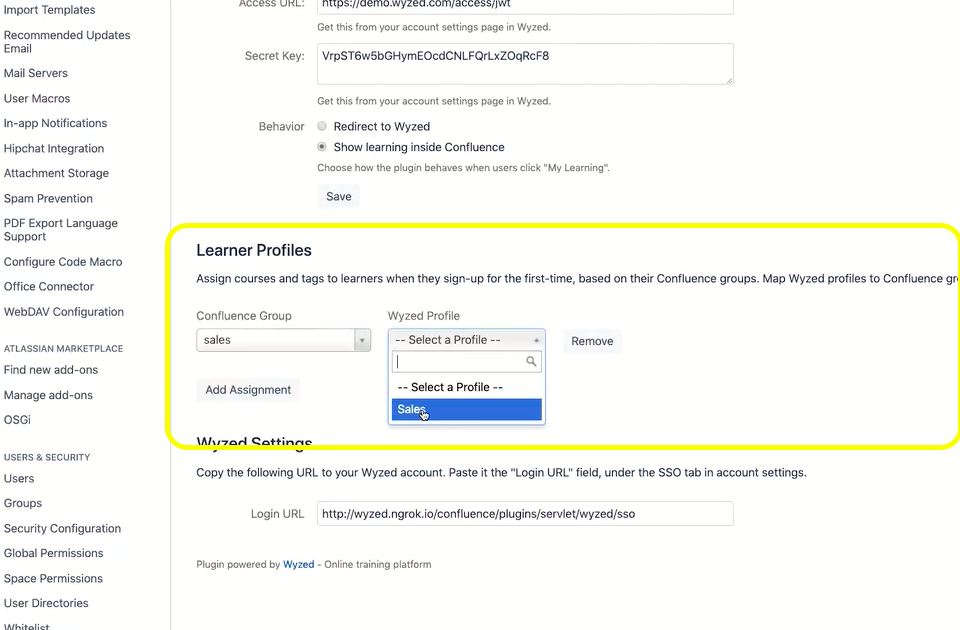
Step 6: Next, we need to create profiles which will allow Wyzed to match the Confluence User’s group and automatically assign that Confluence User with tags, enroll them in courses, and other information in Wyzed when they click their My Learning button on their Confluence Dashboard for the first time.
Step 7: Before doing this, you will need to have course, tags, and other information already created.
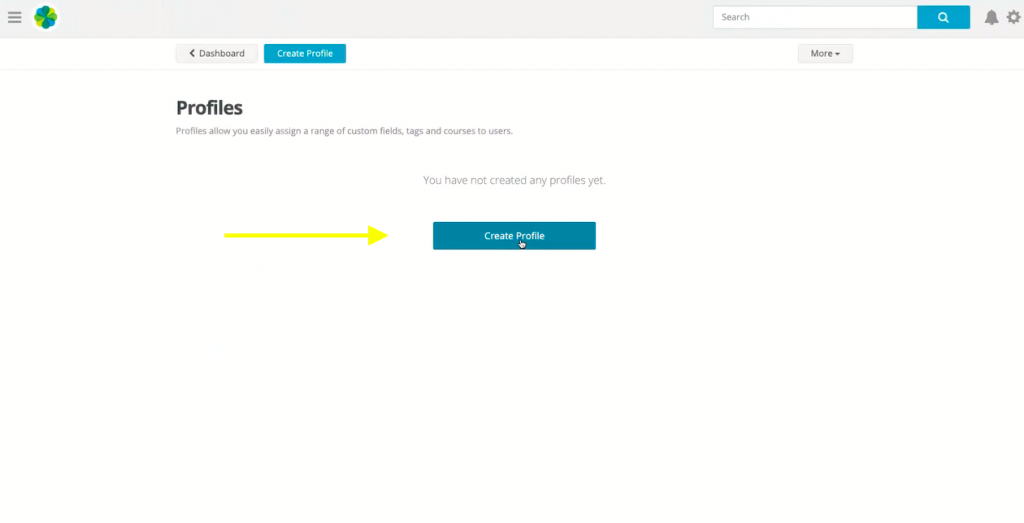
To create your Profiles in Wyzed, click on the top left hand side and then select the Profiles tab.
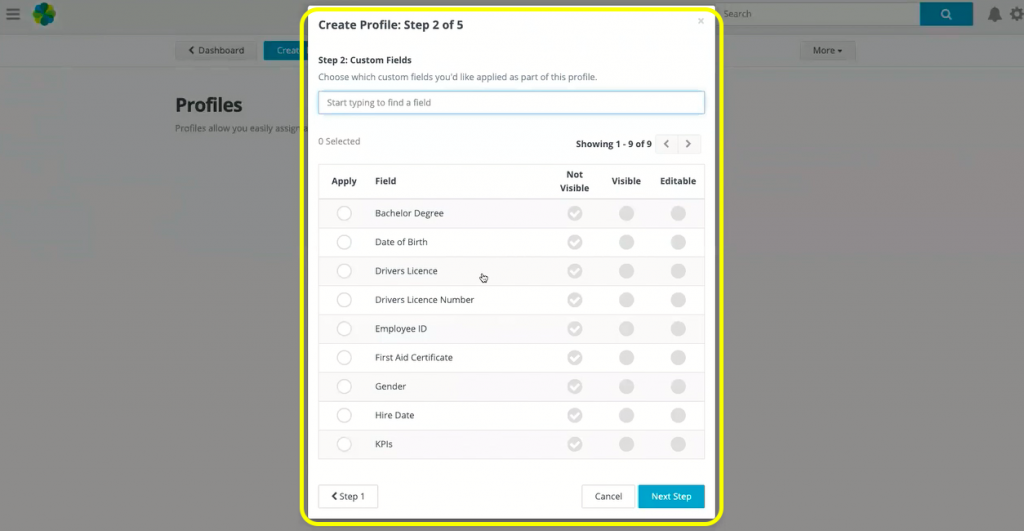
Step 8: Click “create profile” to begin creating your first profile.
Step 9: Firstly, select the fields of information you want to track for your Confluence Users in Wyzed. I.e. Licences, qualifications, other misc information.
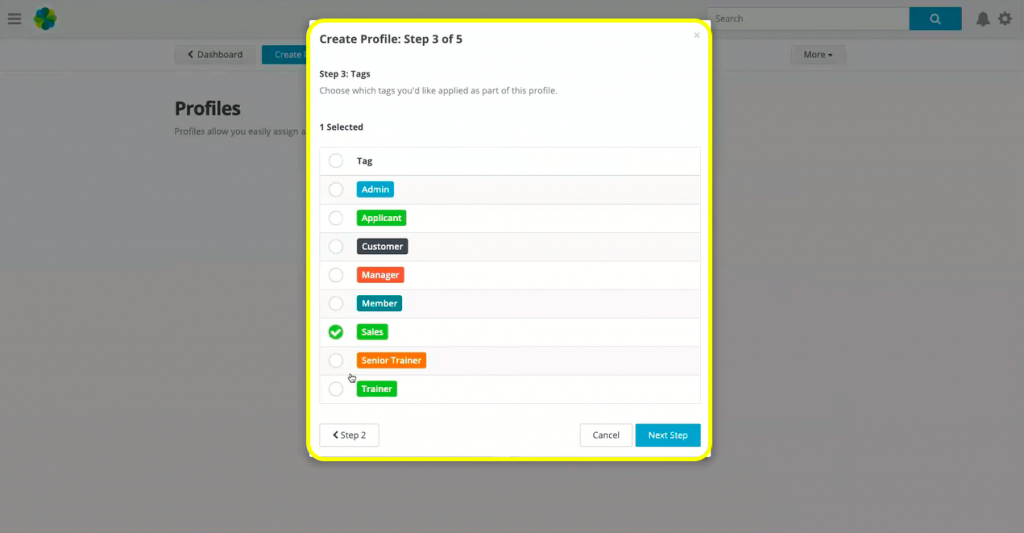
Step 10: Then, select the tags you want applied to your Confluence Users in Wyzed. This will allow you to easily track and sort by the tags in the Wyzed system.
Step 11: Then, we select the course we want the Confluence User to be initially enrolled into when they click the My Learning Button on their Confluence Dashboard for the first time.
Later on, you will enrol your Confluence Users in additional courses directly in the Wyzed system.

Step 12: Save that and then go back to your Confluence Wyzed Configuration page where you can match the Confluence Groups up with the Wyzed Profile.
Make sure you click the Add Assignment button got save that and you can repeat for as many profiles as you’d like.